Sunday, October 30, 2016

Using strips of scrap paper

Hello, yet again. I am never on the computer to work and then three blog posts in two days. Zoo will fall off her chair! It is a very grey weekend here and my life is in a weird holding pattern and for some reason doing these posts is a nice break, so here goes another one.

Zoo sent me a link to use up some paper scraps, knowing that I don’t throw anything away and was running out of room in my scrap paper box.
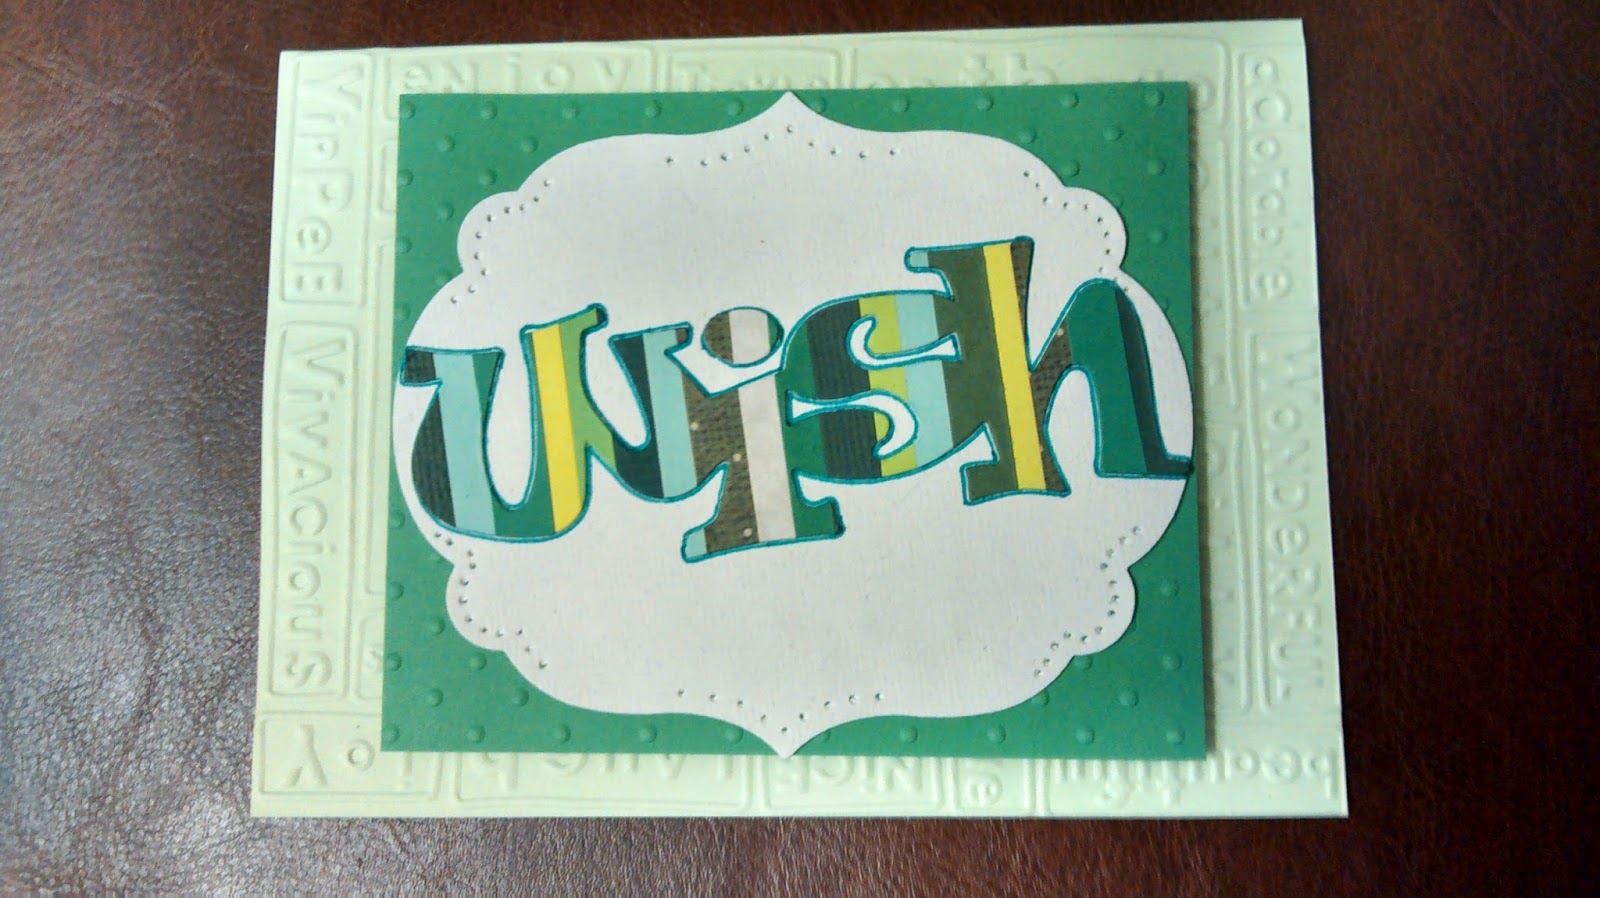
The link was      https://www.youtube.com/watch?v=qv2EL8jZhZ8    and showed how to glue/tape thin scraps of paper onto printer paper and then die cutting out an image or saying to make cards. My scrap paper box was full, so I gave it a try.


I first used up just a few pieces of paper out of my pink scrap box and here is the result. I didn’t measure the width of the strips I cut, but just winged it with my cutter. I liked the slight variances in the widths of the strips. I don’t have a huge selection of dies that cut out sayings and shapes that are not for tags, so I chose my Fredward Bear Die Cut  - by Memory Box Inc.


 It was a little blah with just the bear cut out, so dug out my punch-anywhere flower punch by EK Success Brands and punched out the background. I saved the little flowers, etc., that came from the punch in case I wanted to use them. Much better!!


The two finished cards turned out so cute that I spent an hour or two cutting strips out of more scrap paper and making more blanks to use. Believe me though… a little paper goes a long way! 

 I had an idea to use different edging patterns to cut out waves, etc., from the striped paper. It produced a neat effect without too much difficulty. By tracing the pattern onto the back of the striped paper, it was just a matter of cutting along the lines and placing them in order to be glued onto a plain coloured background paper. I chose black card stock as my background to show off the stripes. I then used my Big Shot to cut out shapes. Like usual, the negative part cut out can be used on the inside of the card or for another card.


I also free-handed a dinosaur to cut out.

This was a fun use of scrap paper. I have started saving thin strips of scrap paper in an envelope to make it easier next time.

Take care! Red Bear : )

Metal Blog page for real

After practicing with the metal tape, Zoo and I were to do a page in our AAJ2 using this technique. I once again pulled out a variety of things from my collection and went to town. I wanted to use drywall tape, fun foam embossed to look like waves on the water, my tree punch and left over twig punches from Zoo’s punch. These things all reminded me of nature and the great outdoors so I figured I would do a camping theme. Growing up we did a lot of camping and fishing in remote areas and to this day, I love exploring in the woods, hiking, scrambling up and over hills and mountains (I dislike bugs a little more now though).


I started with the drywall tape diagonal across both pages, as the walking path. Then I added the road using my 1999 Lyuell Harlow LG611 Stone Wall brass embossing plate. This I experimented with in my Big Shot. I put the metal tape on strips of card stock, ran it through the Big Shot, and then applied it to the page using more metal tape. Being a very thin brass plate it and then layers of tape on top, it didn’t show a deep embossed effect but doable for this. I thought I needed a defining line between the path and the road so I used the beaded string to make the road edges. 


                  Next, I started on the lake. I used the fun foam with waves embossed in it (purchased at the Dollarama). I cut it to fit up in the corner and wanted to find something in my stash to act as a rocky shore. I had purchased, from the fabric store, a set of two 80’s patches with antique brass half domes sewn on them. They were 99 cents and so I bought one for myself and one for Zoo. They reminded me of the shoulder patches in the Michael Jackson era and made my day at the time. Zoo, of course, didn’t have a clue why I had bought them or what the heck to do with them when she received hers : )        They did work perfect for a rocky beach, though, so this page was making me smile all the way during the process so far!


 For the grass, I used a million twig punches. Zoo needed a twig punch for some Christmas cards we were working on a year or two ago and I found one at Walmart here and sent it out to her. Before I send it, however, I killed my hands by punching out a million of them for my use. Well, I used up almost my entire stash in this project. The grass is made up of many, many layers of the twig punches glued on and then taped over. I found that my double-ended embossing tool worked the best to bring out the desired texture. I love the grass. I guess I am a little bit of a tactile person and running my hands over the grass and other areas on this page feels cool.

The tree in the upper left corner is made with my Fiskars tree punch. It was too small so I cut out more of them and trimmed the branches off and added them to expand the branch system. It turned out cute. The page needed a little something so I added a van cut out of card stock and taped over. I attached it using foam dimensionals on the top and glue and the two metal brads (bought from Dollarama years ago – yes… I love the dollar store!!!). 


I painted it with the black paint a couple of times until it had the effect I wanted.


I must say, that I do love this page. I had my book standing up on my table with this page open for weeks. Playing with metal tape is fun and inexpensive. Zoo and I will have to do more with it in the future.


 Enjoy! Red Bear : )


Friday, October 28, 2016

Metal Tape Practice

Hello again. Long time no see! Life… you know : )

Zoo found something on line about making boxes, frames and tags with metal tape. Ironically, this was at the same time that my husband and I were doing renovations and were using this product. Needless to say, I was intrigued to find a use for the tape that didn’t involve long days of ripping a building apart and months of rebuilding it.

The links she originally sent were as follows:


We decided to experiment during one of our Skype craft sessions and began by rummaging through our supplies to see what variety of things we could try under the tape.  I found: metal and paper die cuts; sequence shapes; punches; chip board buttons; a button; a pink felt heart; bead string; raised red stars; and a wooden oval with the letter T cut out of it. I tried different numbers of layers to see how the tape would cover each thickness (I wrote the number of layers beside the objects glued to the page).


 I then covered the entire page with metal tape. Not knowing what I was doing, I put the tape on in nice even rows so only the objects show through.  This looked very blah when finished, so I added more layers and shapes of tape on top to give it some character. Finding things to push the tape into and around the objects was a challenge. I ended up using the lid to a gel pen and my fingers for the most part. Using my double ended embossing tool, I added details like a spider web, grass, etc.


When it came time to paint over the tape I used Crafters Acrylic paints purchased at Dollarama. I tried three colours per page and discovered that I prefer just plain boring black. The other colours I found just looked odd. 


Lessons I learned in this experiment were that: different size and shape pieces of tape gives the paint more places to sit to show off the object; tears in the tape going over the beads and wood objects can be hidden when painted; even one layer of paper shows up through the tape, so it is not always necessary to layer objects to be seen; and adding details with pens or other tools is fun and adds personal touches.


Have fun! Red Bear : )