A good start. I think it should begin in High School myself.
High hopes for mandatory Indigenous courses set to start at U of W - Aboriginal - CBC:
"According to a 2011 Statistics Canada report, nearly 17 per cent of Manitoba's population identified as aboriginal — four times the Canadian average."
'via Blog this'
Zoo
Thursday, September 01, 2016

Tuesday, August 30, 2016
Chalk Card - and - Paper Bow
Chalk Card
 |
| Chalk Embossed Card |
Pick a contrasting, in my case, a dark olive green, card base.
Cut a piece of contrasting, in my case, white, cardstock to fit the top of the card. If I were to do this again, I'd cut the white about one quarter of an inch smaller so as to show a larger frame of the dark colour border.
Emboss top of card.
Brush chalk on raised embossing. Use one or three colours. In this case I used a yellow-green chalk and an darker olive green chalk.
You can use:
- Pan Chalk, the brand I have is Pebbles Inc. Ikandee Chalks "Earth Tones" 42003.
- what we typically think of as "teacher's chalk", the brand I have is Prang Gallery AMBRITE colored chalk for papier 53012, or,
- Chalk Pencils. The brand I have is Faber-Castell PITT Pastel 1122-170 and 1122-174.
[I just did a Google Search for each of the product links I used. I get my supplies from a local art supply store.]
Then use a nesting set of dies to cut a frame from the center of the white embossed card stock. The set I used was Framelits - Labels Collection 125598, from my Stampin' Up dealer. Save the remaining frame for use on the inside if you like, or for another project.
Add a bit of bling a sentiment, and anything else you like on the inside and you're done!
 |
| Sentiment, Owl and Feather stamped with Memento Rich Cocoa ME-800 |
--------------------------------------------
DIY Embellishments - Paper Bows
Edited to add: click on the title above, it's a link to the video^^I just discovered this video today and was impelled to try it as she said she was going to go over it again quickly!
I had some scrap tissue paper laying around and cut a 6 by 6 inch square and followed along. Too easy! If I can do it, you can do it!
 |
| Crafting NOT at my crafting table! |
The smaller you cut your initial square, the smaller the bow. No more extra postage for mailing a card just because you wanted a bow for it!
 |
| Ta Da! |
Sunday, May 22, 2016
More Texture Paste
Good Morning.
It has been a long while since I have done a blog post and upon looking though my pictures, I found some more texture paste cards I have made. I thought I would include those in an easy continuation of using up the paper I have made theme and the texture paste creations theme.


I used up the remains of my last batch of paste that was starting to dry up by adding some kids glitter glue to it. I used three or four different stencils and covered a whole piece of canvas with it. I love it but have been mulling over what to do with it for months now. I don't want to ruin it so will keep mulling it over until I figure out what will look good or loose patience and just experiment (the more likely of the two).

I hope everyone is enjoying their Victoria Day long weekend. Our weather here is gorgeous and we hear lawn mowers and motorbikes galore. Happy Spring!!
Red Bear : )
It has been a long while since I have done a blog post and upon looking though my pictures, I found some more texture paste cards I have made. I thought I would include those in an easy continuation of using up the paper I have made theme and the texture paste creations theme.


 |
| These two are from my original experiments with texture paste and I didn't know what to do with them. I don't do Halloween cards or decorations with the kids all moved out on their own, but turning them into 'shocking' birthday cards turned out cute and usable. |

I used up the remains of my last batch of paste that was starting to dry up by adding some kids glitter glue to it. I used three or four different stencils and covered a whole piece of canvas with it. I love it but have been mulling over what to do with it for months now. I don't want to ruin it so will keep mulling it over until I figure out what will look good or loose patience and just experiment (the more likely of the two).

I hope everyone is enjoying their Victoria Day long weekend. Our weather here is gorgeous and we hear lawn mowers and motorbikes galore. Happy Spring!!
Red Bear : )
Wednesday, March 16, 2016
Button Art
Good morning Bloggers,
Today’s topic will be about a recent creation I made for
Zoo’s daughter, who has been ill. It so happens, that Zoo had recently sent me
some links into the world of buttons and I decided it would be fun to delve
into that for my get-well wishes, and so it began….
I don’t know what the protocol for inserting other people’s
links are, but I will do it here so you can see where I came by the inspiration
and some of the methods I mention.
http://bustedbutton.com/2015/05/18/button-turtle/ and http://bustedbutton.com/2012/01/29/button-tree/ and http://bustedbutton.com/2012/04/27/button-elephant/

At this point I had
to go looking through papers to see where a purple dinosaur would look good
living. I found in my folder of paper I had made or manipulated a lilac card
stock with texture paste stars on it. This was one done in my first experiments
with texture paste and the StampinUp! Stars stencil.
I then had to take
off the buttons and place them in order carefully on a cleared space on my desk
in order to trace the dinosaur onto my paper of choice (this step could be
avoided if you had already traced it onto the paper to begin with!). I took the
advice of one of the bloggers in the links above and I coloured the figure with
a purple watercolour pencil crayon and used my aqua pen to paint it smooth. I
am not convinced this was necessary, as I can only see a tiny, tiny bit of the
purple paint in the finished product. I imagine that if the buttons were see
through or the seed beads didn’t reach all the empty spaces it would have been
a good idea to have the proper colour under the buttons.
For glue, I ended up using Royal Coat Dimensional Magic. It
is a clear liquid that when dries stays raised and see through to accent what
is on the paper. I picked it because I hoped the buttons would sink into it and
be welded into place. I did not want to do all this work and then have the
buttons fall off in a month.
Once I had all the buttons glued into place, it was time to
get the seed beads out and get started on them. At the beginning, I was sorting
out the pale purple beads out of the mix of all pastel colours. It soon became
apparent that it was going to take a lot more beads than I had first thought,
and so I stopped sorting the purple ones out and poured the whole colour scheme
on. This part in the process shows my lack of patience in the nit picky and I
found it a challenge to finish it all in one sitting. However, once I finished
the spikes and had some of the darker beads around the body it started looking much
better and I was able to complete it. I wanted it to dry flat so I placed it
between layers of parchment paper and placed a couple of heavy book on it to
dry for a few days.


Have a happy St Patty’s Day tomorrow and happy crafting!
Red Bear : )
Wednesday, January 06, 2016
Textured Wall paper Butterfly Card
Surprise… It’s me again. I thought I would be out of
character and be the first one to do a blog post the other day to shock Zoo and
here I am again. Like she said, I do produce a lot of cards to send to friends
and family every month. My cards are fun to make and not always as detailed as
Zoo’s but I enjoy sitting down and seeing what will be the finished product of
the relaxing time spent in my craft room. As Zoo has now received the card I
wanted to tell you about next, here it is.

I had some leftover textured wallpaper from renovating our
upstairs bathroom and was playing with my water soluble wax pastels (by Caran
D’ache of Switzerland) and my Stampin’Up! Aqua brush. I love the feel of the wallpaper! It is soft and pliable even after
the pastels were applied, painted with water and dried. I kept the pieces of
painted paper out to mull over what I wanted to do with them until inspiration
finally struck.
I recently purchased a large page of butterfly stencils (one
for me and one for Zoo) with four types of butterflies on it, all about 4”
square in size. They are gorgeous. As the first card was to be for Zoo I chose
the end of the wallpaper that had a lot of peach/pink on it. I used washi tape
to attach the paper directly to the back of the stencil where I wanted it and
then proceeded to cut out all the shapes
carefully, so as not to cut the stencil. It worked very well, though the hands
and elbow barked at me afterward. I saved the bits I cut out and placed them
aside in the correct placement for use on another card.
I found a little scrap piece of textured green paper that
looked good under the butterfly and then mounted it on a complimentary pink
card stock. I mounted the entire top piece onto the card stock using a piece of
fun foam. It gave a uniform thickness and as it turns out, I didn’t have to pay
extra postage. Yay! The idea of using the fun foam came from a YouTube video
Zoo had sent me (sorry but I can’t find it at the moment – maybe Zoo will add
the link later). I liked the uniform thickness for this card but on some cards
I made the other day it didn’t make a difference between that and the double
sided sticky taped dimensional squares I usually use.
The saved bits of the cut out butterfly I glued onto a plain
piece of white card stock. It made a nice subtle card. Here is that one and some
others I made with the remaining big pieces of wall paper. I really liked how
the butterfly shows up so well from across the room. I wasn’t sure what I was
going to use the butterfly stencil for but boy did this turn out nice! Oops.
Forgot to mention that the stencil was made by Craft Décor. Cool... the computer
added the asterisks for me.


Hope you enjoy the butterflies. They made my day!
Red Bear : )
Saturday, January 02, 2016
Using up scraps
Good morning and Happy 2016.
For a couple of months now I have been trying to use up some of the paper I have made or painted over the years and also to use scraps of paper and odds and sods from around my craft room. I always discover things I forgot I had when hunting for something in my craft room and it is my goal to use these things more often in future.


For a couple of months now I have been trying to use up some of the paper I have made or painted over the years and also to use scraps of paper and odds and sods from around my craft room. I always discover things I forgot I had when hunting for something in my craft room and it is my goal to use these things more often in future.
With that in mind, I found two tiny baggies containing
little squares and four sided stars. I can’t for the life of me remember what
project the squares are left over from but the little pointed bits are left
overs from using a friend’s die cut plate. It was a stained glass type of die
and because I never throw anything away, I saved the tiny bits in a baggy and
forgot about them for a couple of years.
I haven’t used my embossing powders for a while (some of
which are over 20 years old) and wanted to compare my old Bridal by Personal Stamp Exchange and my new Iridescent Ice by Stampin’Up!. The pink and purple one is Bridal and the blue/green one is Iridescent Ice. I prefer the Bridal one for this project but there is
tinsel like sparkles on the Iridescent
Ice one that in batter light is cool.
In making the card I wanted to use a stamp to cover all the
squares and then to pull them apart and place them on a darker background. I
had to think for a moment to find a way to keep all the little squares together
while stamping, heat embossing and then keep them in order so I could transfer
them to the darker paper. I used my ZiG Memory
System 2 way glue dotted all over a scrap piece of paper, let it dry (with the
help of my heat gun, as I am not a patient person while crafting) and then
placed the squares on in the pattern I wanted. It worked like a charm!!


The two stamps I used are my favourite background stamps,
both by Stampin’Up! I prefer the floral
one as it had more surface area to emboss but they both worked well.
I used brads the
colour of the background paper to bring depth to the card and it finished it
off nicely. Now I just have to do the insides of the cards and then start all
over with the remaining squares and pointy bits to use them all up so they don’t
go back a drawer for a couple more years.
I hope everyone has an awesome 2016 and that you and yours
are happy, healthy and near loved ones!
Take care and have fun,
Red Bear : )
Sunday, November 15, 2015
DIY Texture Paste by Red Bear
Hello. I figured my first blog post would have to be similar
to tearing off a band aid …. just take a breath and rip. So here goes. As Zoo
says, I dislike being on the computer and surfing is not my thing. I am
constantly amazed at the personal data and information people put on-line and
for me to venture forth into the world of Blogging feels a little hypocritical but hey…what you do in
the name of friendship is beyond hilarious : ) Having said that, I have to admit to
enjoying the activities and inspiration
that comes with the things Zoo has found for us to do during her travels on the
world wide web. So, if someone reads our blog and gets something from it then
we will be paying back for the fun things Zoo has found. I cannot say I will be
as informative as Zoo or as longwinded :
) but I may grow into this method of
communication, you never know. I can see my youngest daughter rolling her eyes
at me when I say things like that for others to read. I am completely outdated
and lame but that’s cool with me.
So…. Adventures with Texture Paste is our first topic. As
Zoo mentioned, I am cheap and never throw anything away. As it turns out it was
a good thing for this experiment. I save most of the things I cut out with my
Big Shot and below are the first things I tried when we played with the texture
paste. These stencils, left from cutting out dies on the Big Shot, are just
basic card stock and I had to be careful when spreading the texture paste on as
the paper tends to curl when wet and the texture paste bled under the paper
more than a plastic stencil. The snowflake shapes I ended up cutting out and
using on Christmas cards (sorry no photos from that long ago. Zoo can add one,
as I mailed one of the cards to her). The swirly one on green is the leftovers
of a die cut using vellum paper. It curled so much it was very hard to work
with and was not of any use to redo again when I pulled it off the paper after
the texture paste was applied. (the card stock template I dried flat sandwiched
between wax paper, making sure the curling bits laid flat again. They dried
well to be used again and are now a bit thicker with the added paste that did
not wipe off). The dress on green is a stamp I have that I stamped then cut out
with a sharp knife to use in this experiment. It turned out cute except for one
part that bled through a little but it was a good use of rubber stamps to make
a template.
 |

The remainder of the samples I tried were used with plastic
templates found either in the sewing/fabric store or cheap kiddy ones I had on
hand.


This particular template is made of a thicker plastic; therefore the texture paste is much thicker, as well. If you are using thicker paste for cards it will cost more to mail and I worry about the card bending and breaking up the paste in transit. This box that I painted with plain dollar store acrylic paint then texture pasted on the hearts using the cheap stencil was fun to do and adds my favourite colour into a corner of my craft room that was missing some red.

To add to Zoo’s info on texture paste, I would like to say
that I prefer the baby powder paste. It has a nice feel when dry and has more
give when bending the paper. I made my Christmas cards last year using the tree
stencil Zoo posted and I wanted to have some glitter in the paste. Can I just
say that it did not turn out and I wasted a lot of glitter in the attempt. I
tried using glitter in the actual paste hoping it would shine when dry. I can
sort of see it in a couple of places on maybe two of the 40+ cards I had made.
My suggestion is to sprinkle on some glitter after you have used the stencil to
paste it on. Good luck : )

The above picture is of the first page of the mixed media
book Zoo and I started together. Page one was to have texture paste of the
stencil I cut in half and brought to her and stamps. I put paint in the texture
paste to see how it would work and I really liked the effect. The clear stamps
I used were representing what Zoo means to me and it was fun using her word
stamps and bending them to fit into the circles.
So.... months have gone by and, like taking off a band aid, I have fretted for nothing. This wasn't as hard as expected and my teacher, Zoo, has been very patient with me. I hope anyone who ventures our way enjoys crafting with us. Take care and have fun!
Helping Red Bear make her first post!
I thought copying from Word would be a PITA, but, apparently not! phew!
We want to add a picture. Let's pick a couple old sigs I made a long long time ago on Delphi Forums, my first venture online.
 |
| Canadian Sue |

I was so proud when I made this one, my first original sig that turned out so so pretty. I was a SBP master using Paint Shop Pro.

So We're Done! Yay!
Zoo
 |
| My first sig. Rain made this for me. Sending warm thoughts to Rain. :) |
Tuesday, June 23, 2015
A Door Opening - AAJ#2 - Oct. 2013 page
The Challenge: Use the leaves Zoo collected. I also found this tutorial:
Sizzix Tutorial | Mixed Media Canvas by Vivian Keh and her associated Blog Post.
Tutorial starts at 5:54, up to then she itemizes the dies she used and cuts the shapes.
The OP [original poster] used a stretched canvas for this mixed media page so I got it stuck in my head that I needed to use a piece of canvas. You can buy pads of canvas for painting on just like pads of watercolor paper or mixed media paper.
I also decided, for the first time, that I needed to rotate my book to the vertical for this project. Red Bear did hers differently so I'll be excited to see her take on this challenge!
Here is my layout sketch.
I did my sketch in watercolor pencils, knowing that they would melt into the paint as I applied it.
I had decided I wanted my door to open, thus the border on the door part of the sketch. I had to plan for the door to be on one side, or the other, of the center of the book. I didn't think the door would stand up well to being folded in half and bending as the book opened or closed.
On the canvas, it looked very bottom heavy, then I remembered that the canvas was smaller than the book itself, so it worked out fine in the end.
I also laid out the paint colors I thought I would be using. My color plan was to start with pale blue in the upper right of the project [bottom right in the photo above], to pinks to purple to red all along the bottom [left in photo].
You'll also notice that the bottles of "Dr. Ph. Martin's" colors are concentrated WATERcolor paint. Yes, I mix acrylic paint and watercolor paint all the time. I have also used Matte Medium for acrylic paint with just watercolor paint or stamp pad re-inkers to color it! That is one of the perks of being self-taught, I don't know the rules I may be breaking as we play!
I'm also enamoured, lately, with the interference paints of various colors, so that's where some of the shimmer comes from as well as from Iridescent Medium.
For the snowflakes, I got the bright idea to use my texture plates [and embossing folders as texture plates] with coffee filters to make the "paper" to cut the snowflakes from.
I always cut a slit in my coffee filters before coloring them, so they lay flat. Looks cool with the watercolor pencil on the coffee filter. I just put the coffee filter over the texture plate/bump up side of embossing folder and rubbed over it with a watercolor pencil.
I used a combination of Faber-Castell Albrecht Durer watercolor pencil and Inktense watercolor pencil.
Then I used a spray bottle to wet the coffee filter. Oh My! These colors turned out a lot darker than I was anticipating! Except the pink one doesn't look like anything at all! I wonder what they'll look like after they're dried?
Here are some of the flakes cut out and the beginning of a layout plan with the door, leaves, and snowflakes. I thought my die cut flakes were all on the big side so I used a border and corner punch to make some smaller flakes. I also used some of the wax paper flakes that are a by-product of using wax paper to cut intricate die cut shapes.
Wait a minute! There was no orange in the color plan! Shit happens! When the creativity of the moment calls for a change in plan, plans change! I don't remember why I put orange in there, maybe Red Bear remembers?
The darker than anticipated color of the coffee filters wasn't so overwhelming once the snowflakes were cut out of them. There were a few drip marks in the paint that I didn't care for, so I used snowflakes and/or leaves to cover them!
OK, I think this is it! Time to start gluing everything down!
As you can see, I changed my mind when it came time to put glue to paper to canvas! I decided to include an intricate die-cut that Red Bear sent me a while ago and to not use a couple of the larger, darker snowflakes.
I also "cheated" a bit on our challenge in that I didn't limit myself just to the leaves I collected for this particular project. I found some big oak leaves from our yard that I felt were big enough to anchor the project in the bottom left.
The sentiment "The Seasons of Life are Ever Changing" came from Red Bear.
I dropped a red pen shadow on the leaves.
If you open the last picture in a new tab or window to view it as large as it will go, you may notice and wonder about the horizontal bubble-lines in the red at the bottom. If you zoom in and go to the very bottom right corner. In between the two leaves, you'll notice a mostly orange blob with what looks like little horns coming out of it. hmmm, .... very strange.
I had decided to add an element to the page before this in the book, that needed holes put in the paper. But I had already started this one, ... what to do?
Instead of making a glob of a big knot, I let the threads just be loose, split them, colored them with markers to match the background, and used a blob of GAC to hold them in place. [GAC is Glossy Accent, Clear by Inkadinkado]. After the GAC dried, it looked ridiculous. so I just added dashes of GAC all over the page below where the canvas ended. Then added some paint on top to make them "blend in".
Did I succeed? Did you notice the blobs on your own or did you have to go back and look after I pointed them out? I'm curious to know, leave a comment!
Oh, and, duh, here's a pic with the door open. Seeing as how I went to the effort to make the door open, I should include a pic!
Done!
~Zoo~
General info/chit-chat about this altered art journal page.
So far, I've deemed every October page to be "leaves" oriented. I don't know how many more times Red Bear will let me get away with this but ... this time, I had collected some leaves from my sister's house. We were meeting there to plan our mother's funeral and I was outside on a smoke break when I noticed some pretty leaves. I divided my haul and sent half of them to Red Bear.
During one of my adventures out surfing the interwebs, I discovered the tutorial and blog post. This is the email I sent Red Bear:
I'm pretty sure Red Bear suggested we use snowflakes instead of butterflies to symbolize the transition from fall to winter to better match the time of our journal page.
Normally, I would have revelled in creating some hand-bombed lettering but this time I used an alpha stamp set for the large sentiment and just plain-printed my parents names and dates. Maybe my emotions got the better of me, but I just wasn't up to my usual enthusiasm for lettering. I originally printed their names in purple and dates in red, then decided I didn't like it, so traced over them with black. That's where I stopped because things were getting messier rather than better!
Sizzix Tutorial | Mixed Media Canvas by Vivian Keh and her associated Blog Post.
Tutorial starts at 5:54, up to then she itemizes the dies she used and cuts the shapes.
The OP [original poster] used a stretched canvas for this mixed media page so I got it stuck in my head that I needed to use a piece of canvas. You can buy pads of canvas for painting on just like pads of watercolor paper or mixed media paper.
I also decided, for the first time, that I needed to rotate my book to the vertical for this project. Red Bear did hers differently so I'll be excited to see her take on this challenge!
Here is my layout sketch.
 |
| Layout - sideways |
I did my sketch in watercolor pencils, knowing that they would melt into the paint as I applied it.
I had decided I wanted my door to open, thus the border on the door part of the sketch. I had to plan for the door to be on one side, or the other, of the center of the book. I didn't think the door would stand up well to being folded in half and bending as the book opened or closed.
On the canvas, it looked very bottom heavy, then I remembered that the canvas was smaller than the book itself, so it worked out fine in the end.
I also laid out the paint colors I thought I would be using. My color plan was to start with pale blue in the upper right of the project [bottom right in the photo above], to pinks to purple to red all along the bottom [left in photo].
You'll also notice that the bottles of "Dr. Ph. Martin's" colors are concentrated WATERcolor paint. Yes, I mix acrylic paint and watercolor paint all the time. I have also used Matte Medium for acrylic paint with just watercolor paint or stamp pad re-inkers to color it! That is one of the perks of being self-taught, I don't know the rules I may be breaking as we play!
I'm also enamoured, lately, with the interference paints of various colors, so that's where some of the shimmer comes from as well as from Iridescent Medium.
For the snowflakes, I got the bright idea to use my texture plates [and embossing folders as texture plates] with coffee filters to make the "paper" to cut the snowflakes from.
 |
| Texture plate and Embossing Folders |
I always cut a slit in my coffee filters before coloring them, so they lay flat. Looks cool with the watercolor pencil on the coffee filter. I just put the coffee filter over the texture plate/bump up side of embossing folder and rubbed over it with a watercolor pencil.
I used a combination of Faber-Castell Albrecht Durer watercolor pencil and Inktense watercolor pencil.
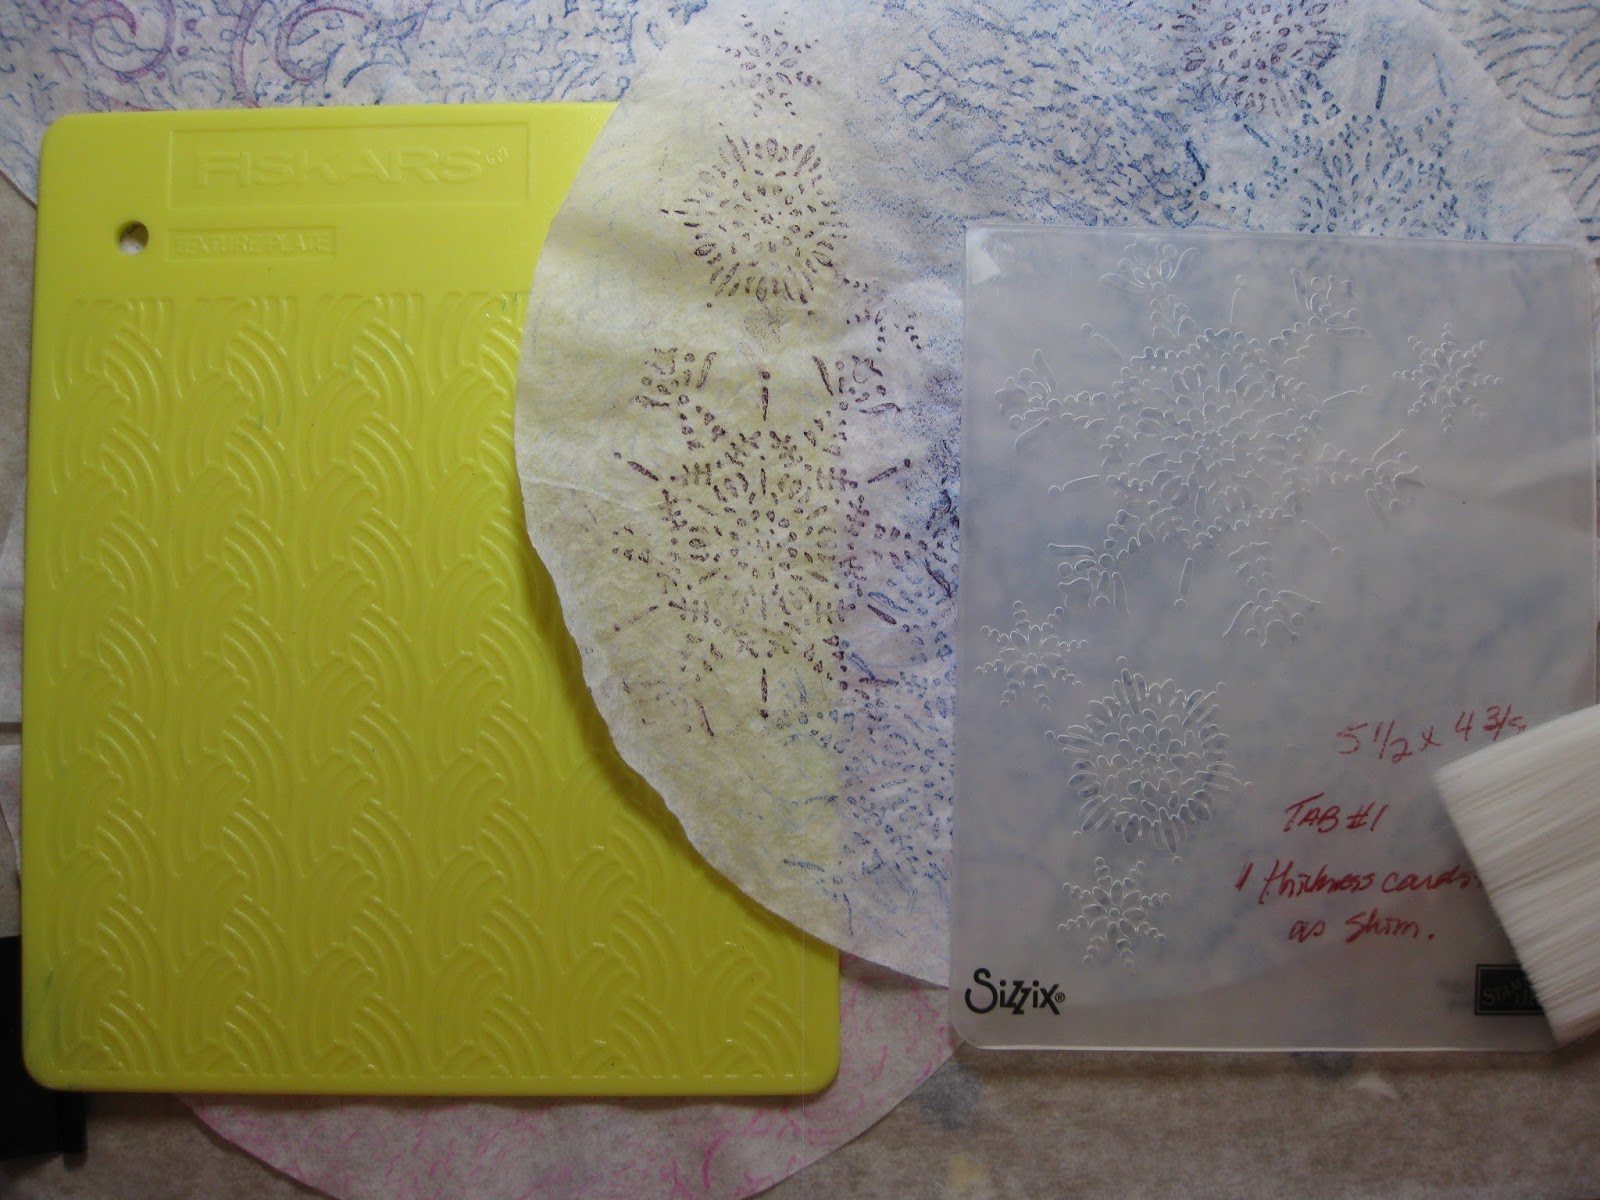 |
| use the embossing folder "bumped up" side and do like a "bark rubbing" |
Then I used a spray bottle to wet the coffee filter. Oh My! These colors turned out a lot darker than I was anticipating! Except the pink one doesn't look like anything at all! I wonder what they'll look like after they're dried?
 |
| Whoa! Those teals are not so subtle! |
 |
| Plan A - what goes where? |
The darker than anticipated color of the coffee filters wasn't so overwhelming once the snowflakes were cut out of them. There were a few drip marks in the paint that I didn't care for, so I used snowflakes and/or leaves to cover them!
 |
| Strategic Snowflake Placement |
OK, I think this is it! Time to start gluing everything down!
 |
| Yes, this is where I want everything! |
 |
| Unless I change my mind! |
As you can see, I changed my mind when it came time to put glue to paper to canvas! I decided to include an intricate die-cut that Red Bear sent me a while ago and to not use a couple of the larger, darker snowflakes.
I also "cheated" a bit on our challenge in that I didn't limit myself just to the leaves I collected for this particular project. I found some big oak leaves from our yard that I felt were big enough to anchor the project in the bottom left.
The sentiment "The Seasons of Life are Ever Changing" came from Red Bear.
I dropped a red pen shadow on the leaves.
If you open the last picture in a new tab or window to view it as large as it will go, you may notice and wonder about the horizontal bubble-lines in the red at the bottom. If you zoom in and go to the very bottom right corner. In between the two leaves, you'll notice a mostly orange blob with what looks like little horns coming out of it. hmmm, .... very strange.
I had decided to add an element to the page before this in the book, that needed holes put in the paper. But I had already started this one, ... what to do?
Instead of making a glob of a big knot, I let the threads just be loose, split them, colored them with markers to match the background, and used a blob of GAC to hold them in place. [GAC is Glossy Accent, Clear by Inkadinkado]. After the GAC dried, it looked ridiculous. so I just added dashes of GAC all over the page below where the canvas ended. Then added some paint on top to make them "blend in".
Did I succeed? Did you notice the blobs on your own or did you have to go back and look after I pointed them out? I'm curious to know, leave a comment!
Oh, and, duh, here's a pic with the door open. Seeing as how I went to the effort to make the door open, I should include a pic!
 |
| A Door Opened |
~Zoo~
General info/chit-chat about this altered art journal page.
So far, I've deemed every October page to be "leaves" oriented. I don't know how many more times Red Bear will let me get away with this but ... this time, I had collected some leaves from my sister's house. We were meeting there to plan our mother's funeral and I was outside on a smoke break when I noticed some pretty leaves. I divided my haul and sent half of them to Red Bear.
During one of my adventures out surfing the interwebs, I discovered the tutorial and blog post. This is the email I sent Red Bear:
"This is different and totally not what I was expecting to do with our leaves!
We will have to improvise, but I think we'll be able to create our own door with our paper cutter and score boards.
Of course we have a plethora of snowflakes and butterflies to choose from.
Really different "painting" technique! We don't have the type of paints she uses but I already have in mind some of my supplies that I want to use with this. I'm drawing a blank, I can't remember what you have for paint but I'm sure you'll be able to come up with a couple of colors to use.
I'm excited to try this one!
Start the video at 5:34. Up to that point she is just listing the dies she uses and cutting the shapes."
I'm pretty sure Red Bear suggested we use snowflakes instead of butterflies to symbolize the transition from fall to winter to better match the time of our journal page.
Normally, I would have revelled in creating some hand-bombed lettering but this time I used an alpha stamp set for the large sentiment and just plain-printed my parents names and dates. Maybe my emotions got the better of me, but I just wasn't up to my usual enthusiasm for lettering. I originally printed their names in purple and dates in red, then decided I didn't like it, so traced over them with black. That's where I stopped because things were getting messier rather than better!
Thursday, April 02, 2015
D.I.Y. Texture Paste
This is the YouTube video that started it all, the recipes we ended up using, and some photos of some of my projects with the resulting texture paste.
Homemade Modeling/Texture Paste Comparison
Luvleescrappin
Baking Soda Texture Paste
1 Tablespoon Gesso
4 Tablespoons Baking Soda
1/2 Tablespoon Iridescent Medium
Baby Powder Texture Paste
2 Tablespoons Gesso
4 Tablespoons Baby Powder +*
1 Tablespoon Mod Podge
* needed a couple extra squirts baby powder - not very thick
I was anxious to use iridescent medium, anticipating a lovely shimmer in the end result. --sad face-- Well, that didn't happen!
These are the samples I did the day we made the paste:
Well, that one didn't work so well. Red Bear was ahead of me, of course, and said "You have to be careful with pointy stencils like this. Best to gently scrape the paste from the outside edge of the point inward, carefully avoiding the point on the opposite side."
To use a single line, I'd have to mask off the adjacent lines to avoid a mess. The only part that gives me pause with this stencil is the gaps.
I don't know if you noticed the date on the last photo. We made the texture paste in November 2013.
One day I was leafing through my practice altered art journal and noticed this pretty page. [whenever I have leftover paint that I can't waste, I usually slap it on a page or two in my practice AAJ] The colours reminded me of Northern Lights and I wondered if I could use a cake icing trick with the texture paste.
I put some of the paste in a small plastic bag, clipped a hole in one corner and used it like a pastry tube to "draw" with the texture paste.
Then I used a moistened finger to push the paste around. Finally, I added some black gesso I had a sample of. I haven't taken this project any farther yet.
Fast forward a bit. To February 2015. Red Bear was in town on a visit. She brought a lovely stencil she found that was big enough to chop in two and share. :) For once, my snail pace was an advantage. While we were prepping, I had thought that I might want to angle the stencil.
Of course, Red Bear was way ahead of me, and lay her stencil down in a very linear fashion. I soon as I saw hers, I knew I had to angle mine!
Because of ... reasons ... we're way behind in our second Altered Art Journal [AAJ2], but something I had noticed on a previous shopping trip to the art store was itching at me. This trip, I had to get each of us a "Mixed Media Journal" by Strathmore.
Truthfully, I can't see much of a difference in the paper compared to any of the other journals but, they are officially now our Altered Art Journal #3, AAJ3.
I wanted us to do our first page together, while she was here in person even though I was still working on page one of AAJ2!
The theme had to be "friendship" and "winter", using the stencil she shared.
Note: That texture paste was over a year old. Made in Nov. 2013, applied Feb. 2015. Very cool!
I dunno, I'm not 100% happy with the "best friends" tag on the wooden oval. I might take the sandpaper to it and replace it with something else. What do you think?
I started adding some colour with Tim Holtz Distress Ink Pads, "Peacock Feathers" is the teal and "Lemonade" was the yellow. But the yellow wasn't showing up much, so out came my watercolor pencils.
Faber-Castell Albrecht Durer watercolor pencil. I was a bit fearful that when I took my aqua pen to the pencil to paint it around, the texture paste might dissolve, but you can see it did not!
The metal flake is a Tim Holtz charm. Die cut white cardstock flake swirls are a die that Red Bear has. I just love it and am thankful that she shared some cuts with me.
In this next shot, you can see the wax paper die cut snowflakes I applied to the center of the circles. I just stamped them all over with Versamark embossing ink and used an iridescent embossing powder, a new one from Stampin' Up called "Iridescent Ice".

That's the Texture Paste post folks. Now it's Red Bear's turn to blog!
Edit to add a link to Red Bear's D.I.Y. Texture Paste Post.
Later 'Gators, Zoo
Sneak Peek: Red Bear made these pieces that we're using for an upcoming AAJ2 page. I can't wait to see what we make of these!
Texture Paste, Gesso, Glue, Glue Gun Stamps, Stencils, Molds; Stamp Ink Pad, Blending Ink, Roller Stamps [in Sumi Smoosh videos], Glimmery Spray, Twinkly Watercolour Paint, Embossing Folders, and Ink Blending Tools.
For when you just can't wait to obtain supplies and you need to art right this very minute. Using household supplies and things you may already have in your craft room.
When you can't find just the right stamp or stencil, you can make your own with your glue gun, or inexpensive fun foam and a toilet paper roll. Adding your own style and expression at the same time. Make your art more you!
When you want to try a new medium but don't want to purchase something you may not enjoy using.
Some of these are truly cost saving, like the texture paste. Baking soda, Baby Powder and some kind of medium you already have v.s. a single use product. Also, making your own roller stamps are far more cost effective than purchasing a ready-made product.
Some of these ideas, like the gesso and the glue, I will probably continue to purchase commercially but isn't it nice to know that if you're in a bind [like living in a remote location, or, say, stuck in a storm] you can proceed to art without a trip to the store!
Includes 27 Tutorials on:
DIY Glimmer Mist [6]
DIY Roller Stamps [in the 2 Sumi Smoosh by Diana Trout Tutorials]
DIY Blending Solution [alcohol - 1]
DIY Texture Paste [2]
DIY Distress Ink Blending Tools
DIY Gesso [1]
DIY Glue [2] one is fascinating making glue from milk, haven't tried it yet.
DIY Stamp Ink Pad
DIY Hot Glue Gun Stamps & Stencils [2 - future post]
DIY Hot Glue Gun Mold [2]
DIY Twinkling Shimmering Watercolour Paint [1]
DIY Embossing Folders [3]
------------------------------------------------------------------------------------
Homemade Modeling/Texture Paste Comparison
Luvleescrappin
-----------------------------------------------------------------------------------
Recipes we used:Baking Soda Texture Paste
1 Tablespoon Gesso
4 Tablespoons Baking Soda
1/2 Tablespoon Iridescent Medium
Baby Powder Texture Paste
2 Tablespoons Gesso
4 Tablespoons Baby Powder +*
1 Tablespoon Mod Podge
* needed a couple extra squirts baby powder - not very thick
-----------------------------------------------------------------------------------
I honestly don't remember why I was researching texture paste, perhaps Red Bear does and she can remind me in her post. I was delighted when I found the comparison video. The recipes were simple, used ingredients I had in the house, and instantly brought to mind variations to try. I was anxious to use iridescent medium, anticipating a lovely shimmer in the end result. --sad face-- Well, that didn't happen!
These are the samples I did the day we made the paste:
 |
| Template made with die-cuts. Glossy black postcard paper. |
Well, that one didn't work so well. Red Bear was ahead of me, of course, and said "You have to be careful with pointy stencils like this. Best to gently scrape the paste from the outside edge of the point inward, carefully avoiding the point on the opposite side."
 |
| Easy Stitches - these would make great borders! |
 |
| I've used this garden planning template for more crafts projects than I've ever used it for planning any gardens! |
 |
| This is my favourite design. It's a quilting stencil. |
One day I was leafing through my practice altered art journal and noticed this pretty page. [whenever I have leftover paint that I can't waste, I usually slap it on a page or two in my practice AAJ] The colours reminded me of Northern Lights and I wondered if I could use a cake icing trick with the texture paste.
I put some of the paste in a small plastic bag, clipped a hole in one corner and used it like a pastry tube to "draw" with the texture paste.
Then I used a moistened finger to push the paste around. Finally, I added some black gesso I had a sample of. I haven't taken this project any farther yet.
 |
| Twinkling H2O Watercolor Paint ~ "Snapdragon" |
 |
| Finger smooshing. yes, that is a technical crafting term. |
 |
| Black Gesso - who knew there was such a thing? |
 |
| Now what? ----------------------------------------------------------------------------------- |
Of course, Red Bear was way ahead of me, and lay her stencil down in a very linear fashion. I soon as I saw hers, I knew I had to angle mine!
Because of ... reasons ... we're way behind in our second Altered Art Journal [AAJ2], but something I had noticed on a previous shopping trip to the art store was itching at me. This trip, I had to get each of us a "Mixed Media Journal" by Strathmore.
Truthfully, I can't see much of a difference in the paper compared to any of the other journals but, they are officially now our Altered Art Journal #3, AAJ3.
I wanted us to do our first page together, while she was here in person even though I was still working on page one of AAJ2!
The theme had to be "friendship" and "winter", using the stencil she shared.
 |
| AAJ3-1 "friendship" "winter" "circle stencil" |
I dunno, I'm not 100% happy with the "best friends" tag on the wooden oval. I might take the sandpaper to it and replace it with something else. What do you think?
I started adding some colour with Tim Holtz Distress Ink Pads, "Peacock Feathers" is the teal and "Lemonade" was the yellow. But the yellow wasn't showing up much, so out came my watercolor pencils.
Faber-Castell Albrecht Durer watercolor pencil. I was a bit fearful that when I took my aqua pen to the pencil to paint it around, the texture paste might dissolve, but you can see it did not!
The metal flake is a Tim Holtz charm. Die cut white cardstock flake swirls are a die that Red Bear has. I just love it and am thankful that she shared some cuts with me.
In this next shot, you can see the wax paper die cut snowflakes I applied to the center of the circles. I just stamped them all over with Versamark embossing ink and used an iridescent embossing powder, a new one from Stampin' Up called "Iridescent Ice".
That's the Texture Paste post folks. Now it's Red Bear's turn to blog!
Edit to add a link to Red Bear's D.I.Y. Texture Paste Post.
Later 'Gators, Zoo
Sneak Peek: Red Bear made these pieces that we're using for an upcoming AAJ2 page. I can't wait to see what we make of these!
 |
| What would YOU make with these? |
------------------------------------------------------------------------------------
My Playlist: DIY_craft_suppliesTexture Paste, Gesso, Glue, Glue Gun Stamps, Stencils, Molds; Stamp Ink Pad, Blending Ink, Roller Stamps [in Sumi Smoosh videos], Glimmery Spray, Twinkly Watercolour Paint, Embossing Folders, and Ink Blending Tools.
For when you just can't wait to obtain supplies and you need to art right this very minute. Using household supplies and things you may already have in your craft room.
When you can't find just the right stamp or stencil, you can make your own with your glue gun, or inexpensive fun foam and a toilet paper roll. Adding your own style and expression at the same time. Make your art more you!
When you want to try a new medium but don't want to purchase something you may not enjoy using.
Some of these are truly cost saving, like the texture paste. Baking soda, Baby Powder and some kind of medium you already have v.s. a single use product. Also, making your own roller stamps are far more cost effective than purchasing a ready-made product.
Some of these ideas, like the gesso and the glue, I will probably continue to purchase commercially but isn't it nice to know that if you're in a bind [like living in a remote location, or, say, stuck in a storm] you can proceed to art without a trip to the store!
Includes 27 Tutorials on:
DIY Glimmer Mist [6]
DIY Roller Stamps [in the 2 Sumi Smoosh by Diana Trout Tutorials]
DIY Blending Solution [alcohol - 1]
DIY Texture Paste [2]
DIY Distress Ink Blending Tools
DIY Gesso [1]
DIY Glue [2] one is fascinating making glue from milk, haven't tried it yet.
DIY Stamp Ink Pad
DIY Hot Glue Gun Stamps & Stencils [2 - future post]
DIY Hot Glue Gun Mold [2]
DIY Twinkling Shimmering Watercolour Paint [1]
DIY Embossing Folders [3]
------------------------------------------------------------------------------------
Wednesday, April 01, 2015
Introducing Red Bear and a Blog Theme
I started this blog in September of 2006 and really haven't had much to say over the years. Except for the odd commentary on the news or other stuff I tripped over while reading the internets.
I did find that I had a lot to say about the photos I was uploading to my flickr account, and it occasionally occurred to me that I could be doing all of that typing on this blog, rather than in the remarks section of my flickr photos. It was only when I started participating in a blog my daughter started about me playing a computer game, that I realized blog writing isn't so scary and that I could do it.
Finally, a focus and a co-author for this blog! Time to turn this into an Arts 'n Crafts blog. Mainly paper crafts. Cards, Altered Art Journals, Mixed Media, some Scrapbooking, Ugly Paper Competitions, Monthly Challenges, Zentangle and Z.I.A., Painting, Colouring, Lettering and Calligraphy, Stamping, D.I.Y. Craft Supplies and Tools, ... but mostly it's all about the cutting and the pasting of the paper.
Another thing I learned co-writing My Mom Plays WoW, is that everything is better with a friend. It's easier and a lot more fun, to blog with someone than to go it alone. Enter Red Bear, I'll let her tell you where her moniker comes from. This Stampin' Up stamp pretty much says it all about Red Bear and me.
 We've worked together, had kids together, and been posted all across Canada together, and apart, over the past twenty five years. Red Bear is a far more experienced crafter than I, she's been making her own cards as long as I've known her. We've both crafted with the kids over the years. Starting about five years ago we started branching out from stamping cards to other forms of artistic expression. Having said that, I recently caught the card-making-bug.
We absolutely do not take our artistic endeavours seriously. We are self-taught [I failed grade eleven art class], and we do this just for fun.
These posts will be about some of the things we've done that we'd like to share with you. You, anonymous internet reader-crafter, whoever you are! [leave a comment and introduce yourself] Or, are about giving credit where credit is due, and linking you up with other artists on the 'net that have inspired us and taught us.
Red Bear is a bit of a computer-phobe. She loathes being online and is extremely data-sharing-paranoid. I tried to convince her to start a flickr account, to no avail.
My continual requests to take photos of her work, fell on deaf ears. I thought. One day I received quite the package in the mail. Red Bear is so against sharing on the internet, she had physically printed pictures of her work, put them in photo album sleeves and mailed them to me!
I finally convinced her to blog with me by appealing to the one thing that trumps her dislike of all things computer and internet related - saving money. I doubt I would have succeeded with the cost of printing the photos alone, I believe what sealed the deal is that it costs so darn much to mail the photos across Canada!
Red Bear even went so far as to take a computer course. Then, my snail-paced life intervened. It's been a long time since she agreed to blog with me. When she agreed, she said "As soon as you make the texture paste post, I'll start blogging with you".
Well, I can't make the texture paste post until I make an introductory post ... ... time goes by ... ... and here we are. Today is the day the introduction to Red Bear, co-blogging, and a Blog Theme happens.
As mentioned, Red Bear and I have known each other for a long time. I was her on-job-instructor at work, then we were co-workers. Here's a photo of us taken in 1988 at a "winter in July"-themed Air Traffic Controller Check-Out Party.
Gawd, those were the days. That night was only the second time in my life, to date, that I got sick from drinking too much!
When Red Bear and I were pregnant at the same time, my husband went to pre-natal classes with both of us [which raised a few eyebrows that we took delight in.]. We were pen-pals for the many years our different work postings took us all over Canada and beyond. Serendipity brought us back together in the same geographic vicinity when the kids were finishing high school and getting started in their adult lives. That's when we started crafting together almost weekly. One final transfer took her to the other side of the country and for the past three years we've been having weekly Skype Craft sessions.
Yes, we had to get our kids to learn us how to Skype, but as we were physically separated from our offspring, the motherly motivation was high so we learned quickly. Then we realized we could use Skype for more than nagging, money requests, dorm room walk-throughs, and being introduced to our child's new friends!
When I began playing on the internet around 2000, I spent most of my time in arthritis and fibromyalgia support forums. This was long before the days of facebook and we were all advised never to use our real names or reveal personal data. My online "handle" from then was "Zoo" [that's where the name of this blog came from]. Since then, how much we reveal about ourselves online has come full circle, from being "required" to use our real names on facebook, to discovering the nefarious ways people can use data we reveal about ourselves, back to "don't tell 'em nothin".
We won't be using our real names on our craft posts. I've always referred to my daughter as "Kidlet" and my husband as "Himself", and will continue to do so. We'll sign-off our craft posts as Red Bear or Zoo so you'll know who is posting.
Red Bear is very linear and task oriented, which is great when we just need to get some crap done. I tend ramble and wander all over the place, getting distracted many times along the way from point A to point B, which is great for new discoveries.
We both love to make our own paper for crafting with.
We are very fond of putting our own spin on ideas and sometimes you can't even recognize the original work. For example, we often talk about "Sumi Smoosh" as in "we could use some sumi smoosh paper for this ..." or, something Red Bear said very recently "We haven't done Sumi Smoosh in awhile, we'll have to do some soon!" Shortly after Red Bear said that, in preparation for writing a few of these blog posts, I looked up the original Sumi Smoosh by Diana Trout. While I was re-watching the two videos, I wrote down this question to ask Red Bear at our next Skype Craft, "how in the world did we get from what Diana does to stamp ink pads and wax paper?". Red Bear's answer, "That's just the way we roll".
I'm eager to blog about our version of Sumi Smoosh and how we turned a sticky lint roller and an empty toilet paper roll into endless, or revolving stamps. We'll see how long it takes to get that post published! [hint: don't hold your breath]
My favourite shape is a circle, Red Bear's is the heart. Red Bear's fave colour is red, mine is green. We are both fond of glitter and/or shimmer. Fortunately we've discovered Perfect Pearls, iridescent medium, and fine glitter so we've moved away from what we now consider "kid's glitter glue" LOL
We are also fond of mocking ourselves, cracking wise, being sarcastic, and occasionally, we swear.
Phew! Done! One down, one to go. If you're still reading, you may have gathered I tend to babble on and on and on. Ya, ... that's not going to change. I write the way I think and talk.
So, enough about us, and on to the crafting! As soon as I get the texture paste post up, Red Bear will begin her blogging career.
Ciao for now, Zoo
I did find that I had a lot to say about the photos I was uploading to my flickr account, and it occasionally occurred to me that I could be doing all of that typing on this blog, rather than in the remarks section of my flickr photos. It was only when I started participating in a blog my daughter started about me playing a computer game, that I realized blog writing isn't so scary and that I could do it.
Finally, a focus and a co-author for this blog! Time to turn this into an Arts 'n Crafts blog. Mainly paper crafts. Cards, Altered Art Journals, Mixed Media, some Scrapbooking, Ugly Paper Competitions, Monthly Challenges, Zentangle and Z.I.A., Painting, Colouring, Lettering and Calligraphy, Stamping, D.I.Y. Craft Supplies and Tools, ... but mostly it's all about the cutting and the pasting of the paper.
Another thing I learned co-writing My Mom Plays WoW, is that everything is better with a friend. It's easier and a lot more fun, to blog with someone than to go it alone. Enter Red Bear, I'll let her tell you where her moniker comes from. This Stampin' Up stamp pretty much says it all about Red Bear and me.
We absolutely do not take our artistic endeavours seriously. We are self-taught [I failed grade eleven art class], and we do this just for fun.
These posts will be about some of the things we've done that we'd like to share with you. You, anonymous internet reader-crafter, whoever you are! [leave a comment and introduce yourself] Or, are about giving credit where credit is due, and linking you up with other artists on the 'net that have inspired us and taught us.
Red Bear is a bit of a computer-phobe. She loathes being online and is extremely data-sharing-paranoid. I tried to convince her to start a flickr account, to no avail.
My continual requests to take photos of her work, fell on deaf ears. I thought. One day I received quite the package in the mail. Red Bear is so against sharing on the internet, she had physically printed pictures of her work, put them in photo album sleeves and mailed them to me!
I finally convinced her to blog with me by appealing to the one thing that trumps her dislike of all things computer and internet related - saving money. I doubt I would have succeeded with the cost of printing the photos alone, I believe what sealed the deal is that it costs so darn much to mail the photos across Canada!
Red Bear even went so far as to take a computer course. Then, my snail-paced life intervened. It's been a long time since she agreed to blog with me. When she agreed, she said "As soon as you make the texture paste post, I'll start blogging with you".
Well, I can't make the texture paste post until I make an introductory post ... ... time goes by ... ... and here we are. Today is the day the introduction to Red Bear, co-blogging, and a Blog Theme happens.
As mentioned, Red Bear and I have known each other for a long time. I was her on-job-instructor at work, then we were co-workers. Here's a photo of us taken in 1988 at a "winter in July"-themed Air Traffic Controller Check-Out Party.
 |
| 1988 |
When Red Bear and I were pregnant at the same time, my husband went to pre-natal classes with both of us [which raised a few eyebrows that we took delight in.]. We were pen-pals for the many years our different work postings took us all over Canada and beyond. Serendipity brought us back together in the same geographic vicinity when the kids were finishing high school and getting started in their adult lives. That's when we started crafting together almost weekly. One final transfer took her to the other side of the country and for the past three years we've been having weekly Skype Craft sessions.
Yes, we had to get our kids to learn us how to Skype, but as we were physically separated from our offspring, the motherly motivation was high so we learned quickly. Then we realized we could use Skype for more than nagging, money requests, dorm room walk-throughs, and being introduced to our child's new friends!
When I began playing on the internet around 2000, I spent most of my time in arthritis and fibromyalgia support forums. This was long before the days of facebook and we were all advised never to use our real names or reveal personal data. My online "handle" from then was "Zoo" [that's where the name of this blog came from]. Since then, how much we reveal about ourselves online has come full circle, from being "required" to use our real names on facebook, to discovering the nefarious ways people can use data we reveal about ourselves, back to "don't tell 'em nothin".
We won't be using our real names on our craft posts. I've always referred to my daughter as "Kidlet" and my husband as "Himself", and will continue to do so. We'll sign-off our craft posts as Red Bear or Zoo so you'll know who is posting.
Some crafting background.
Red Bear's "go to method for adding colour" is chalk, with stamp ink being a close second. Mine is watercolour pencils/coloured pencils, with acrylic paint being a close second. Red Bear operates at super-warp-speed, I am painfully slow. I do have a good excuse, I am cognitively challenged due to some chronic illness, proven with neurological testing where I scored so-low-it-is-off-the-bottom-of-the-chart in cognitive processing ability.Red Bear is very linear and task oriented, which is great when we just need to get some crap done. I tend ramble and wander all over the place, getting distracted many times along the way from point A to point B, which is great for new discoveries.
We both love to make our own paper for crafting with.
We are very fond of putting our own spin on ideas and sometimes you can't even recognize the original work. For example, we often talk about "Sumi Smoosh" as in "we could use some sumi smoosh paper for this ..." or, something Red Bear said very recently "We haven't done Sumi Smoosh in awhile, we'll have to do some soon!" Shortly after Red Bear said that, in preparation for writing a few of these blog posts, I looked up the original Sumi Smoosh by Diana Trout. While I was re-watching the two videos, I wrote down this question to ask Red Bear at our next Skype Craft, "how in the world did we get from what Diana does to stamp ink pads and wax paper?". Red Bear's answer, "That's just the way we roll".
I'm eager to blog about our version of Sumi Smoosh and how we turned a sticky lint roller and an empty toilet paper roll into endless, or revolving stamps. We'll see how long it takes to get that post published! [hint: don't hold your breath]
My favourite shape is a circle, Red Bear's is the heart. Red Bear's fave colour is red, mine is green. We are both fond of glitter and/or shimmer. Fortunately we've discovered Perfect Pearls, iridescent medium, and fine glitter so we've moved away from what we now consider "kid's glitter glue" LOL
We are also fond of mocking ourselves, cracking wise, being sarcastic, and occasionally, we swear.
Phew! Done! One down, one to go. If you're still reading, you may have gathered I tend to babble on and on and on. Ya, ... that's not going to change. I write the way I think and talk.
So, enough about us, and on to the crafting! As soon as I get the texture paste post up, Red Bear will begin her blogging career.
Ciao for now, Zoo
Subscribe to:
Posts (Atom)